


Billions of people around the world suffer with the autoimmune disease asthma. Research to find a cure for asthma is ongoing. Medical documentation shows that patients with poorly controlled asthma develop long term changes in their lungs that can lead to chronic problems and death. Additionally, the 2010 GINA guideline indicates that overweight patients have a higher incidence of asthma attacks and lower levels of lung function. Exercise within the limits tolerable by the patient can be an essential part of asthma control and management. One of the most effective, and yet low impact, low exertion forms of exercise is yoga.
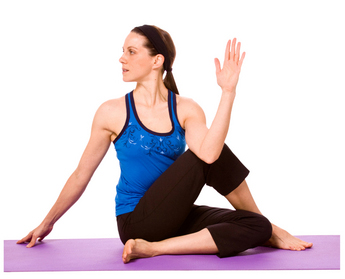
Ardha-matsyendrasana
This asana opens the chest and lungs. Be sure that your spine remains erect and shoulders remain relaxed and leveled.
1. Sit on the floor.
2. Cross your right leg over the left, with the heel on the floor to the left of your left leg.
3. The left foot should touch the side of your right buttock.
If your hips are inflexible, keep the leg on the floor straight.
4. Turn your upper body towards the right knee, placing the back of your left elbow against the outer side of your knee, and your right hand on the floor behind you to brace yourself. Keep your body straight with the weight on the spine, not the arm behind you.
5. Slowly return to your starting posture and repeat for the opposite side.
Caution: Do not perform if you have any form of back injury.
Bhujangasana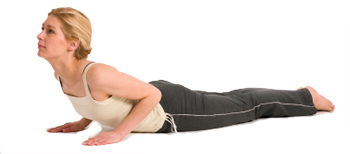
This ansana expands the chest and lungs, and can relieve stress which helps decrease and prevent asthma attacks.
1. Lie down on your stomach, your hands at either side of your chest at the pectoral level.
2. Raise your upper chest so that your head lifts and you can look forward. Do not over arch.
3. Begin lifting your chest with your arms, but not to the point of discomfort.
4. Keep your buttock muscles relaxed during the exercise.
Caution: Do not perform if you have back injury, carpal tunnel syndrome, headaches, pregnancy, hernia, peptic ulcer or high blood pressure.
Chakrasana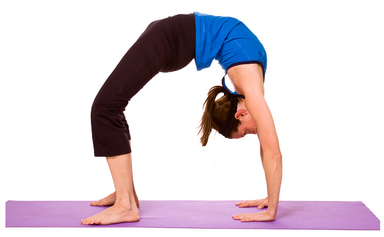
This ansana fully expands the chest cavity and lungs, and strengthens the chest muscles.
1. Lie on your back with your legs apart.
2. Place your arms at your sides, palms facing down.
3. Draw your knees up with your feet near your buttocks, heels touching your buttocks if possible.
4. Place your hands on the floor above your ears, palms down.
5. Inhale slowly and begin lifting your body off the ground, supporting yourself on your hands and legs until your head is no longer on the ground.
6. Stay in this position for about ten seconds.
7. Return to the starting position.
Caution: Do not perform if you have back injury, carpal tunnel syndrome, diarrhea, headaches, and heart problems, high or low blood pressure.
Makarasana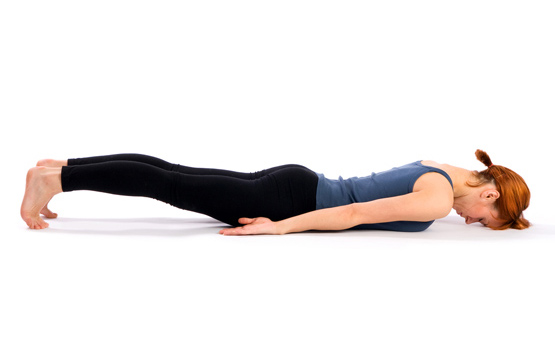
This ansana allows chest and lung expansion and reduces tension and anxiety which is helpful for reducing and preventing asthma attacks.
1. Lay on your belly, legs in a comfortable position straight out.
2. Cross your arms in front of you so that your hands are resting on the opposite shoulders.
3. Rest your chin or forehead on your bent elbows.
4. Relax your legs and spine.
5. Adjust the elbows to minimize tension.
6. Remain like this for several minutes. Breathe deep, slow, calm and steady.
Matsyasana
This asana stretches the upper body to open the chest and lungs. It also helps to fill the lungs with oxygen, so be sure to breathe deeply.
1. Lie on your back with your legs straight out and your arms at your sides with your palms on the ground.
2. Placing your weight on your upper arms and palms, lift your chest off the ground, leaving the crown of your head on the ground forming an arch.
3. Hold this position for a few breaths, remembering to breathe deeply.
4. Release the pose and return to the supine position.
Caution: Do not perform if you have high or low blood pressure, headaches, insomnia, serious lower-back or neck injury.
Parvatasana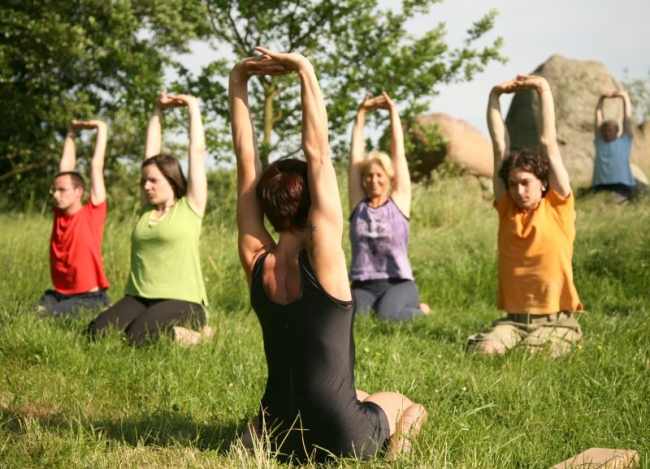
This asna opens the chest, and helps to focus the breathing which can help to relax and calm a person, and reduce or prevent asthma attacks.
1. Sit in the standard yoga pose.
2. Place your hands to form the pose for namaskar.
3. While breathing normally, slowly extend them over your head; you can remain like this, or turn your palms to the sky with the tips of your fingers still touching.
4. Hold this pose for a few breaths.
5. Return to the first pose.
Caution: Do not perform this pose if you have headaches, insomnia, or low blood pressure.
Sarvangasana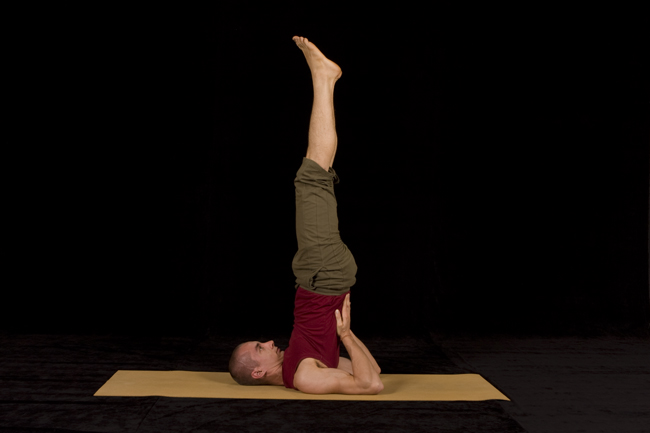
This ansana is said to flush mucus from your lungs, which is beneficial in improving lung function.
1. Lie on your back with your legs together and arms at the sides, palms down. You may support your neck on a neck roll or blanket.
2. Relax and breathe normally.
3. Raise your legs to a 90 degree angle while you inhale.
4. Exhale and arch your legs over your head, as if doing a backward somersault, so your hips and lower back are raised off the ground.
5. Place your hands on the back of your hips and push your body upward.
6. Move your palms up your back to keep your legs and hips rising upwards until your whole body is positioned above your head.
7. Bring your legs up into a vertical position.
8. Support your body with your hands on your ribs and your elbows supported on the ground. 9. Only your head, neck and shoulders should remain on the floor.
10. Balance your body in this position and breathe in a rhythmical state, holding this pose for as long as possible.
11. Slowly return to the starting position by moving in the reverse order.
Caution: Do not perform this pose if you have neck or back problems, heavy menstruation, high blood pressure, infection of the eye or inner ear, pregnancy, diarrhea, headaches, thyroid illness, angina, and spinal problems due to conditions such as arthritis or osteoporosis. Do not move your head or turn it to the left or right when in the pose. Sarvangasana is considered to be an intermediate to advanced pose. Do not perform this pose without the supervision of an experienced instructor. Some yoga instructors recommend performing salamba sirsasana before salamba sarvangasana, others disagree. Always follow your professional instructor’s experienced advice.
Savasana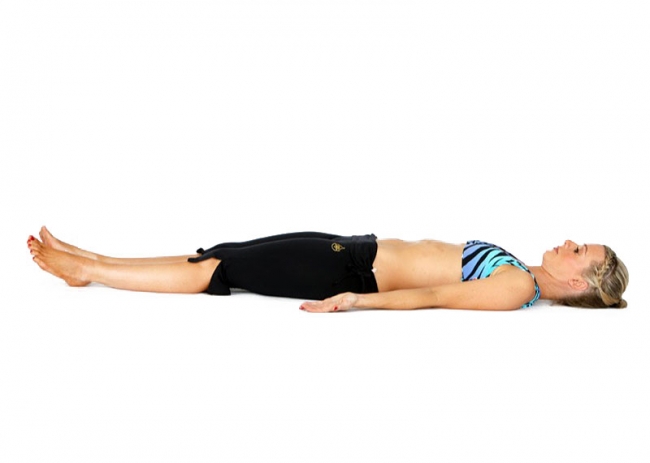
This is the best asana to attain complete relaxation, which helps prevent asthma attacks.
1. Lie on your back and relax, as if you are going to sleep.
2. Place your legs in a slightly spread position so as to be comfortable. Relax your knees.
3. Place your hands palm down about a foot away from your body at your sides.
4. Let your jaw relax; don’t hold the teeth clenched.
5. Close your eyes gently, you can place a cool cloth over them to help aid relaxation.
6. Breathe normally.
7. Concentrate on your breathing and forget about other parts of your body.
8. After either a set time or set number of breaths, open your eyes and slowly get up while stretching your limbs.
Caution: Do not perform this pose if you have back injury or discomfort or pregnancy (do not lay on your back when pregnant as it can cut off the blood supply to the baby).
Sukhasana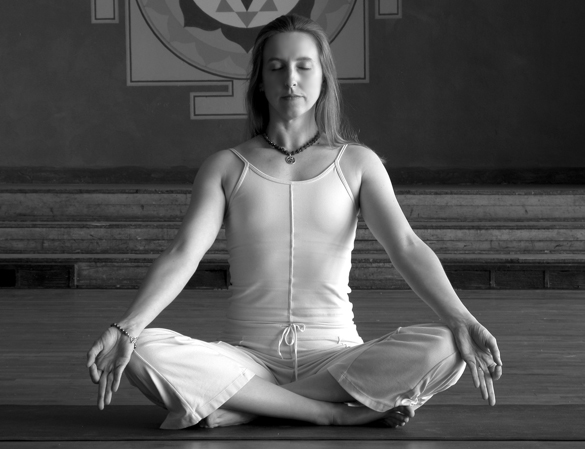
This is the easiest of all the yoga poses for asthma. It aides relaxation and reduces stress.
1. Sit on the edge of a six inch thick folded blanket.
2. Sit with your shins crossed, the way children sit on the floor. This is not the classic yoga sitting pose.
3. Place your hands on your lap on top of each other, palms up, or on your knees, palms down.
4. Sit upright, but do not over arch.
5. Close your eyes and breathe slowly for as long as you wish.
Caution: Do not perform this pose if you have a knee injury.
Tadasana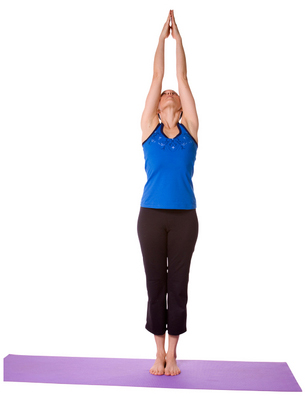
This pose opens the chest and lungs and helps strengthen your muscles.
1. Stand tall and straight, legs together and arms resting at your sides.
2. Inhale as you raise your arms over you, touching palms at the top.
3. Bring your hands down into namaskar pose as you exhale.
4. Inhale slowly and raise your hands back up, palms joined.
4. Raise to your toes, stretching your body as far as possible.
5. Return to the starting position, exhaling.
Caution: Do not perform this pose if you feel any dizziness.
Ustrasana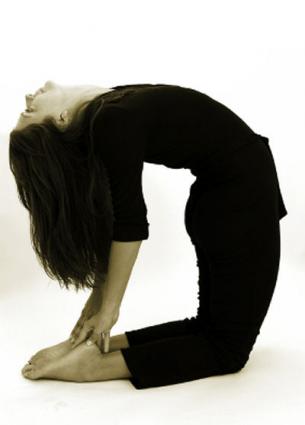
1. Kneel on a mat or blanket on the floor.
2. Place your palms on the top of your buttocks and gently press your pelvis forward; inhale.
3. As you exhale, lean backward as your hands slide toward your feet; chin upward, torso extended.
4. Ease backward into the bend without straining, resting on your hands placed on your heels.
5. Hold for 30 seconds, breathing deeply.
6. Slowly rise forward and move into a child’s pose.
Caution: Do not do this asana if you have high or low blood pressure, migraines, insomnia, lower back pain or neck injury.