


Diabetes has become quite a common disease with every other human being suffering from the disease. It occurs when the body cannot produce enough insulin to regulate sugar levels in the blood. As a result, blood-sugar levels increase rapidly thereby exerting stress on the body organs. Glucose is the basic fuel that our cells use for energy and sometimes the body fails to create enough glucose leading to diabetes. If you are a diabetic patient, then you can maintain your sugar level by practicing yoga exercises.
Paschimothan asana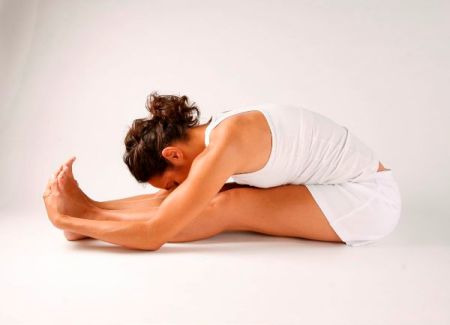
This exercise involves forward bending which gives a complete stretch to the neck, back, hamstrings and calves. At the same time, it directs your attention inward. You can stimulate the entire nervous system, learn to find stillness and relaxation during the period of effort. A specific procedure is followed while doing this exercise. The legs have to be stretched while sitting, lying together with the toes pointing upwards. The lower back should then be stretched with arms raised. Look forward then and straighten your back keeping the chest free and breathe.
While slowly bending forward, stretch your crown upwards and try not to lose the support of your lower back. See that the legs neither move nor tilt. The moment you notice that you can bend further by bending the lower back, move the hands to your lower legs, ankles or feet. Lightly pull the legs, ankles or feet while continuously stretching. After this stretch out your arms forward and slowly raise your upper body, keeping your legs together and toes pointing upwards. Sit up straight and take your original position.
Bhujang asana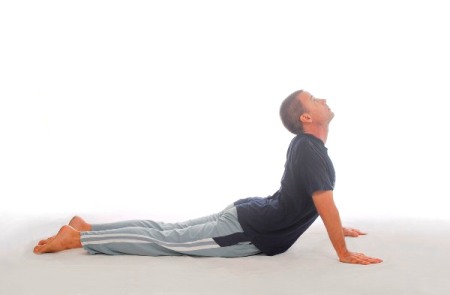
For this procedure, lie on your belly, while your head rests on your lower arms. Raise your forehead, look upwards and stretch your hands backwards. Let your weight rest on your chest. After this the head should fall backwards towards your back and the backward movement should start from the neck and the chin. Move your belly further backward as if someone is pulling your arms. The weight is more and more shifted towards the belly and the lower back does the real work.
If you cannot raise your chest any further, put your hands and arms next to your chest on the mat without losing the bend. Stretch your arms so that they stand perpendicular on the floor and at the same time turn your arms a little inward. Relax your lower back and bear your weight with your arms. The buttock muscles remain relaxed during the exercise. Move your chest further upwards with every breath you exhale. You can now tilt your head back. The shoulders blades should remain low.
Salabha asana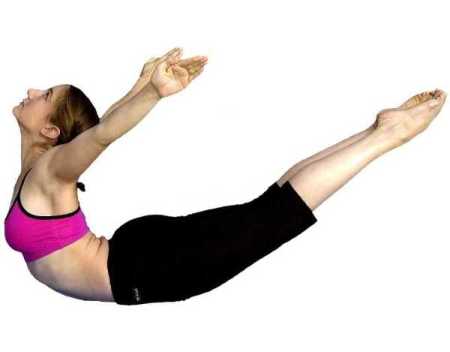
For performing this exercise, lie with your face down on the floor on your stomach, hands stretched backwards close to the body and the legs straight. Close your fists and bring them together beneath the thigh with wrists touching them. Inhale as much air as you can. Holding your breath with your head straight, put the chin on a folded blanket or towel. Tighten both legs and lift them up as high as you can. Do not bend your knees.
Remain in the same posture for a few seconds. Exhale and simultaneously lower the legs slowly to the floor. Do not drop the legs. By the time the legs touch the floor you should finish exhaling. You have now completed one round of the most strenuous posture.
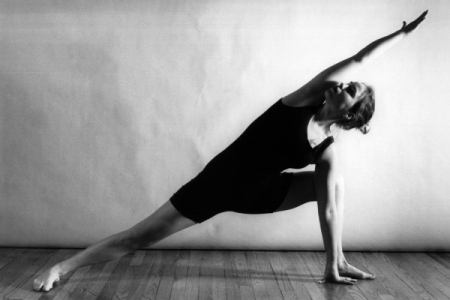
Sarvang asana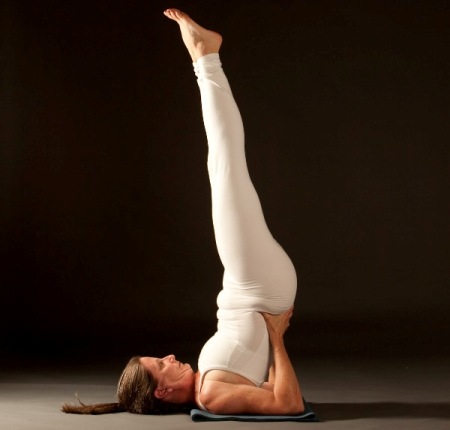
This procedure requires you to lie down with your back on the floor. Your shoulders should lie on the edge and your head rests on the mat. Your legs are drawn in and stand still. Lift your hips off the floor and bring your legs up, over and beyond your head. At this point, lift your back and move your legs further beyond your head.
Straighten your spine and move your hands toward your back. Place your arms against your upper back and try to place your hands as near as possible to the shoulder blades. Try to place your elbows at shoulder-width. If you cannot do this, put them at a somewhat wider distance from each other. If you want, you can use a belt to keep the arms together.
Push your back upwards with your hands. You will get a force upwards coming from the seventh neck-vertebra. Lift up your legs, one at a time, and see to it that the pelvis is placed straight over your back and your hands. Your legs are placed a little forward. Divide the weight of your legs between the hands and the shoulders. Build up strength in the upper lower back and give space to your chest and shoulder muscles. After some time, try placing your arms a little lower in the direction of the shoulder blades on your back. See to it that the elbows do not stand too far apart. Breathe in and out easily and try to balance.